

Making your first contribution can be overwhelming. I know from personal experience. But it is one of the most essential parts of being a software developer. Once we get the hang of it, it doesn't seem too daunting and it becomes a practice. So, in this blog, I am going to lay out the easiest way to make a pull request. And we are going to use cli commands so that we are used to it from the get-go.
I have also made a new repository for a beginner to make their pull request in.

Forking the project
Forking means creating a copy of the existing project. When you fork a repository, it means you are creating a deep copy of all the files and their commit history inside that repo.
Navigate to the repo you want to contribute to and click on the fork option on the top left. Here, you are creating a new repository in your GitHub account.
Cloning The Project
We have created the repo successfully and now it's time to clone it.
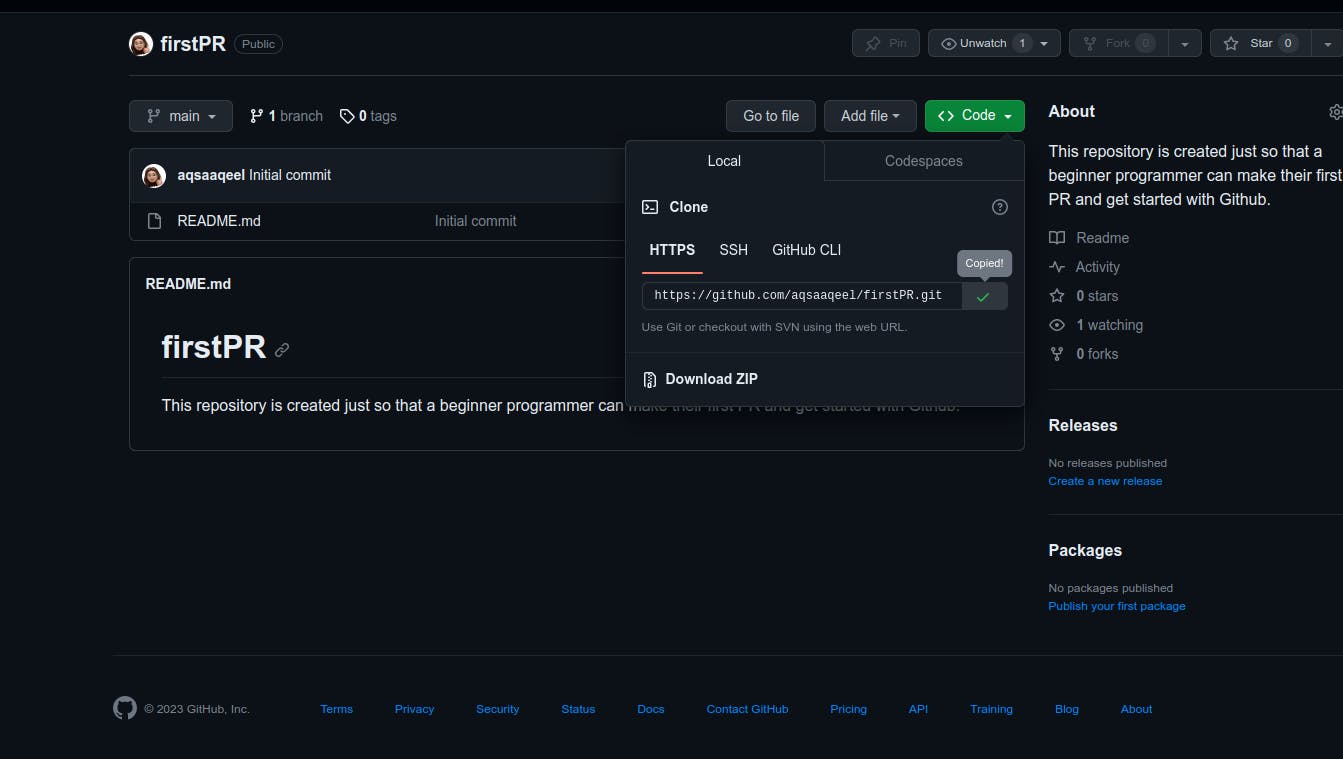
Open the new repository. Clicking on the green code button will give you the links, copy the link as shown.
And run this command in Vscode,
git clone [repository URL you just copied]

Creating a branch
After cloning the repository to your local machine, the next step is to create a branch.
Why do we need a branch? Suppose the code that a developer makes to be one big trunk of a tree. This main trunk is what supplies all the nutrients that keeps the tree alive. But the tree now wants to add fruits to itself so it can attract animals. If the main trunk starts making fruits, it will interrupt other vital functions of the tree. So, it creates a branch, that originates from the main trunk of the tree. But this branch has a variety of things, it has fruits and leaves. When it has served its purpose, it rejoins the main trunk.
Similar is the branch in our code. We want to branch out of the main code so that the changes we make in the code are distinguishable. We can work on our branch without affecting the existing functionality. Late on when we merge it, git will keep track of the changes we made.
After cloning, navigate to the cloned repo on your system and make a branch. It is always a good practice to make a branch,
git checkout -b [branch-name]

Make your contribution
This step is where you make the actual contribution to the project. Make the desired changes.
Commit and push your changes
After making the changes, git will keep track of it. Now, to have them reflected in the official codebase, you need to commit those changes. Before committing, we need to stage the commits. You can use the below two commands to stage and commit. We need to add a comment with the commit too to make the maintainer of the repo understand your code.
git add .
git commit -m "Your descriptive commit message here"

Your commit message could be anything. It should convey what changes you have made.
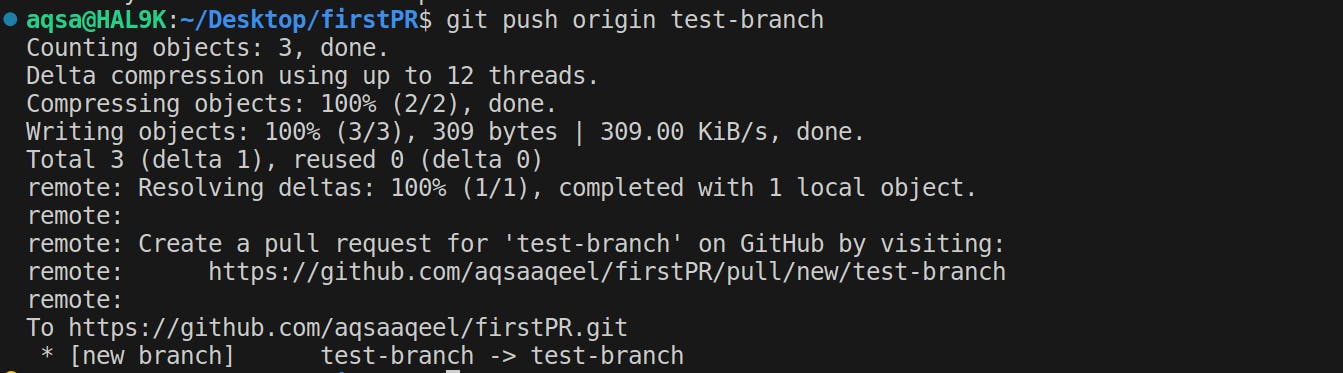
Now, you need to push the changes up to the remote repository. To do so,
git push origin [branch-name]
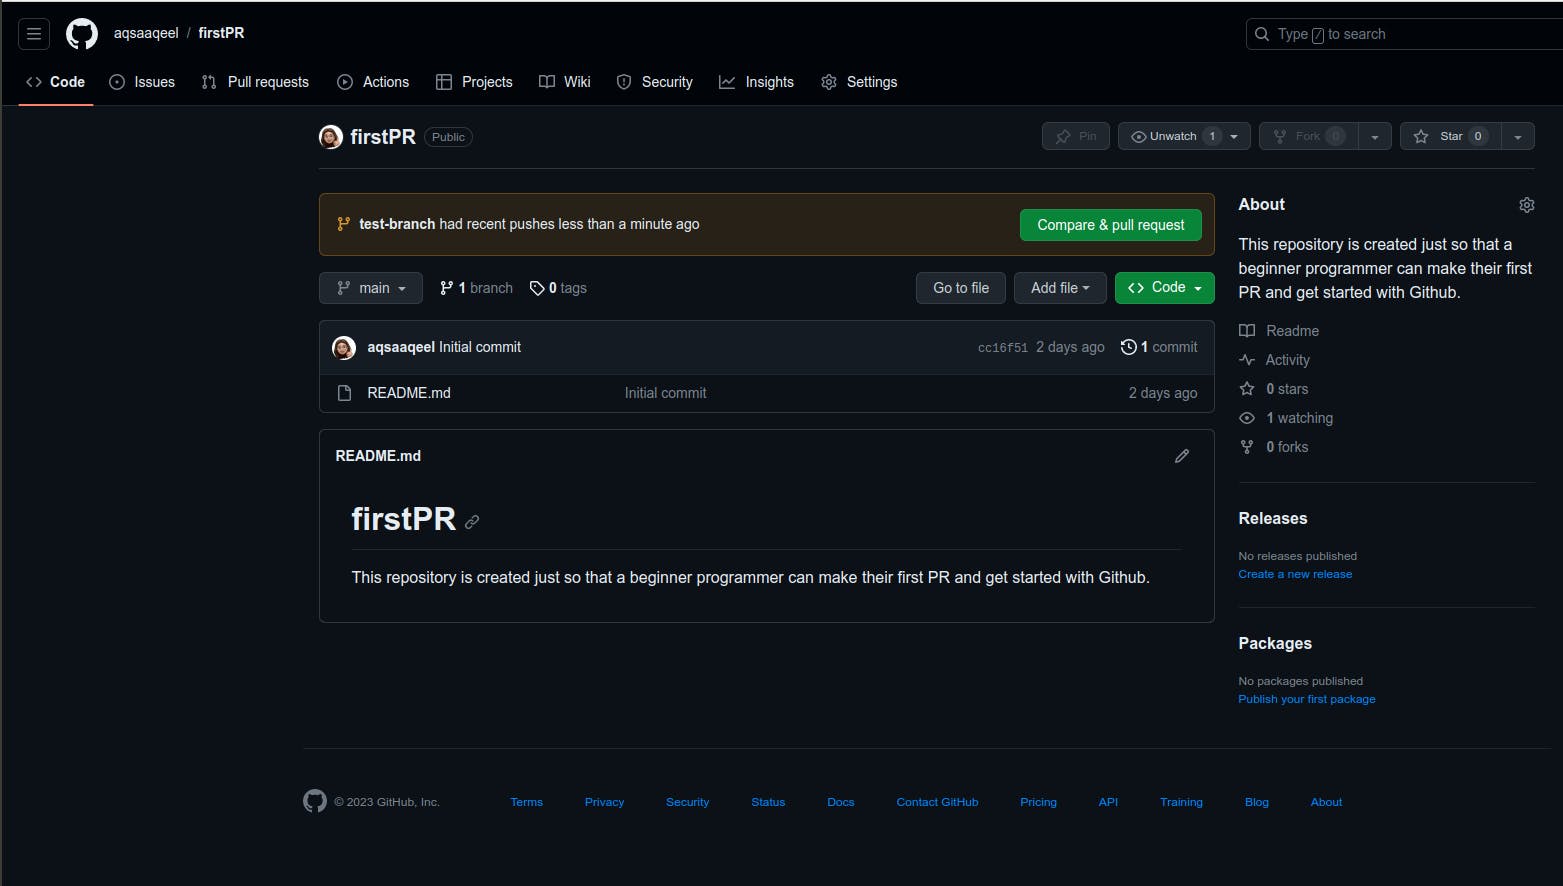
Creating a Pull Request (PR)
Now, you need to head back to the GitHub repository. It will have the option to create a PR as shown here
After writing out the necessary info about the PR, you can click on Create Pull Request. And you're done!
The aftermath
Your contribution doesn't end here. The repository maintainer will review your code, provide feedback, and may request changes. Be prepared to make revisions based on their feedback. If the reviewer approves your changes, they will merge your branch with the main branch, and your code will become part of the official codebase.